


Embroidery Business Owner Questions
- What are the basic supplies I need to start embroidery?
- What type of fabric should I use for embroidery?
- What types of embroidery threads are available, and which ones should I use?
- What are the basic embroidery stitches I need to learn?
- How do I transfer a design onto my fabric?
- What type of embroidery hoop should I use?
- How do I frame and finish my embroidery project?
- How do I care for my embroidery projects?
- What are some good resources for learning embroidery techniques and getting inspiration?
- How do I troubleshoot common embroidery problems, such as knots, tangles, and puckering?
What are the basic supplies I need to start embroidery?
The basic supplies you need to start embroidery include:
- Embroidery needle: Choose a needle with a sharp point and a large enough eye to fit your thread.
- Embroidery thread: Choose thread that is appropriate for your fabric and project. Embroidery thread comes in a variety of materials, including cotton, silk, and rayon.
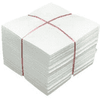
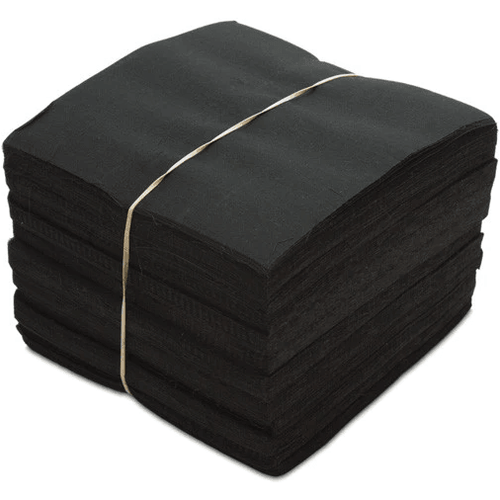
- Fabric: Choose a fabric that is appropriate for your project. Common choices include cotton, linen, and evenweave fabric.
- Embroidery hoop: An embroidery hoop helps to keep your fabric taut and even while you embroider.
- Scissors: You'll need scissors to cut your thread and fabric.
- Water-soluble marker or pencil: Use a water-soluble marker or pencil to transfer your design onto your fabric.
- Thimble: A thimble can help protect your fingers while you stitch.
- Needle threader: A needle threader can be helpful, especially if you're working with fine thread.
- Pattern: Choose a pattern that you like and that is appropriate for your skill level.
- Optional: Embroidery floss organizer, embroidery stand, and embroidery fabric stabilizer.
What type of fabric should I use for embroidery?
The type of fabric you should use for embroidery depends on your project and personal preference. Here are some common types of fabric used for embroidery:
- Cotton: This is a common choice for embroidery, as it is easy to work with and comes in a variety of weights and textures.
- Linen: This fabric has a natural texture and is often used for more traditional or rustic embroidery projects.
- Evenweave fabric: This is a type of fabric that has the same number of threads per inch in both directions, making it easy to count and create even stitches.
- Aida cloth: This is a type of evenweave fabric that has a visible grid, making it easy to count stitches and follow patterns.
- Silk: Silk fabric has a luxurious feel and is often used for more intricate or detailed embroidery projects.
When choosing your fabric, consider the type of embroidery you plan to do, as well as the thickness of your thread and the size of your design. Thinner fabrics are better suited for delicate embroidery, while thicker fabrics can handle heavier thread and larger designs.
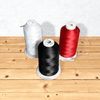
What types of embroidery threads are available, and which ones should I use?
There are many types of embroidery threads available, each with its own unique characteristics.
Here are some common types of embroidery threads and when they might be used:
- Cotton floss: This is the most common type of embroidery thread and is made from mercerized cotton. It comes in a wide range of colors and is easy to work with, making it a great choice for beginners.
- Rayon floss: This is a shiny, silky thread that comes in a wide range of colors. It's often used for machine embroidery but can also be used for hand embroidery.
- Silk thread: Silk thread has a luxurious feel and a beautiful sheen. It's often used for intricate or detailed embroidery projects.
- Metallic thread: Metallic thread is used to add shimmer and shine to embroidery projects. It's often used for holiday or special occasion projects.
- Pearl cotton: This is a thicker, twisted cotton thread that is often used for decorative embroidery stitches such as French knots.
When choosing your embroidery thread, consider the type of fabric you're using, the size of your design, and the effect you want to achieve. Cotton floss is a great all-purpose thread and is a good place to start for beginners. As you gain more experience, you can experiment with other types of thread to achieve different effects.
What are the basic embroidery stitches I need to learn?
Here are some basic embroidery stitches that every beginner should learn:
- Backstitch: This is a basic stitch that is great for outlining and creating fine details.
- Running stitch: This is a simple stitch that is great for creating straight lines and filling in larger areas.
- Satin stitch: This is a filling stitch that is used to create a smooth, satin-like finish.
- French knot: This is a decorative stitch that creates a small, textured knot.
- Chain stitch: This is a versatile stitch that can be used for outlining, filling, or creating decorative accents.
- Stem stitch: This is a popular stitch for creating curved lines and organic shapes.
- Cross stitch: This is a popular stitch for creating intricate designs and patterns.
These are just a few of the many embroidery stitches that you can learn. As you gain more experience, you can experiment with different stitches and create your own unique designs. There are also many online tutorials and books available that can help you learn new stitches and techniques.
How do I transfer a design onto my fabric?
There are several ways to transfer a design onto your fabric. Here are some common methods:
- Tracing: Trace the design onto tracing paper, then use a transfer pen or pencil to trace the design onto your fabric. Alternatively, you can place the tracing paper face down onto your fabric and trace over the design with a stylus or other pointed object.
- Iron-on transfer: Print your design onto transfer paper, then iron the design onto your fabric. This method works best with lighter-colored fabrics.
- Lightbox: Place your design on a lightbox or other backlit surface, then place your fabric on top and trace the design onto the fabric.
- Stencil: Cut out a stencil of your design, then use a fabric pen or pencil to trace the design onto your fabric.
When choosing your transfer method, consider the type of fabric you're using and the complexity of your design. Some methods work better on lighter fabrics, while others work better on darker or heavier fabrics. Additionally, some methods may be better suited for more complex designs, while others are better for simpler designs.
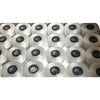
What type of embroidery hoop should I use?
Embroidery hoops come in a variety of sizes and materials, and the type you choose will depend on your personal preference and the requirements of your project. Here are some common types of embroidery hoops:
- Wooden hoop: This is a classic embroidery hoop that is often made from hardwoods such as beech or birch. They come in a range of sizes and are a good choice for most embroidery projects.
- Plastic hoop: This is a lightweight and affordable option that is good for beginners or for projects that require multiple hoop sizes.
- Metal hoop: These are durable and long-lasting hoops that come in a range of sizes. They're a good choice for larger or more complex embroidery projects.
- Snap hoop: These are unique hoops that allow you to easily snap your fabric in and out of the hoop without having to tighten or loosen the screw.
When choosing your embroidery hoop, consider the size of your project and the thickness of your fabric. You'll want to choose a hoop that is slightly larger than your design to allow room for stitching. Additionally, consider the weight of your hoop - heavier hoops can be more difficult to handle for longer periods of time. Ultimately, the most important factor is to choose a hoop that feels comfortable and easy to work with for you.
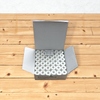
How do I frame and finish my embroidery project?
Once you've completed your embroidery project, you'll want to frame and finish it to protect the fabric and display your work. Here are some steps to follow:
- Remove the hoop: If you used an embroidery hoop, carefully remove the fabric from the hoop.
- Wash and iron: If your fabric is washable, gently wash it in cold water with a mild detergent. Rinse well and gently press out excess water with a clean towel. Iron the fabric using a low heat setting to remove any wrinkles.
- Cut the fabric: Trim the fabric to a size that allows for at least 1-2 inches of extra fabric on all sides.
- Choose a frame: Choose a frame that fits the size of your project. You can find a wide variety of frames at craft stores, home decor stores, or online.
- Mount the fabric: Mount the fabric onto a foam board or mounting board using acid-free tape or glue. Make sure the fabric is centered and straight.
- Frame the project: Place the mounted fabric into the frame and secure it in place. Follow the instructions that come with the frame to attach any hooks or hardware for hanging.
- Optional: Add a backing: You can add a backing to your framed embroidery project to protect the fabric and create a finished look. Use acid-free foam board or mat board and cut it to the size of the frame. Attach the backing to the frame using acid-free tape or glue.
By following these steps, you can create a beautiful and professional-looking finished embroidery project that you can display and enjoy for years to come.
How do I care for my embroidery projects?
Caring for your embroidery projects properly can help preserve them for years to come. Here are some tips to keep in mind:
- Washing: Before washing your embroidery project, check the care instructions for the fabric and embroidery thread. Some threads may bleed or shrink in water, and some fabrics may require special care. If in doubt, hand wash your project in cold water with a mild detergent. Avoid rubbing or twisting the fabric, and rinse thoroughly. Gently press out excess water with a clean towel and air dry flat, away from direct sunlight.
- Storing: When not on display, store your embroidery projects in a cool, dry place, away from direct sunlight. Avoid folding or creasing the fabric, and store it flat or rolled up.
- Handling: When handling your embroidery project, avoid touching the embroidery itself as much as possible. Oils from your hands can transfer onto the fabric and cause discoloration or damage over time.
- Display: When displaying your embroidery project, avoid placing it in direct sunlight or near sources of heat or moisture. Over time, exposure to these elements can cause fading, discoloration, or damage to the fabric and embroidery.
By following these simple tips, you can help preserve your embroidery projects and enjoy them for years to come.
What are some good resources for learning embroidery techniques and getting inspiration?
There are many resources available for learning embroidery techniques and getting inspiration. Here are a few:
- Online tutorials: There are many websites and blogs that offer free embroidery tutorials and patterns, such as YouTube, Sublime Stitching, and Needlenthread.
- Embroidery books: There are a wide variety of books available on embroidery techniques, including beginner guides, advanced techniques, and specific styles or projects. Check your local library or bookstore for options.
- Craft stores: Many craft stores offer embroidery classes and workshops, as well as embroidery kits and supplies.
- Online communities: There are many online communities dedicated to embroidery, such as Instagram, Pinterest, and Facebook groups. These communities can be great sources of inspiration and information.
- Museums and exhibitions: Visiting museums and exhibitions dedicated to embroidery can provide inspiration and a deeper understanding of the history and culture of embroidery.
By exploring these resources, you can learn new techniques, find inspiration for your own embroidery projects, and connect with other embroidery enthusiasts.
How do I troubleshoot common embroidery problems, such as knots, tangles, and puckering?
Embroidery can be a rewarding hobby, but it can also come with its share of challenges. Here are some tips for troubleshooting common embroidery problems:
- Knots and tangles: Knots and tangles can be frustrating to deal with. To avoid them, try using shorter lengths of thread, and always thread the needle with the end that was cut from the spool, not the end that was pulled through the fabric. If you do encounter knots or tangles, carefully remove the thread and start again.
- Puckering: Puckering occurs when the fabric is pulled too tightly or the stitches are too close together. To avoid puckering, make sure you are using the correct tension on your hoop or frame, and try spacing your stitches a little further apart. If you've already stitched a section that is puckered, try gently stretching the fabric while it's still damp, or use a steam iron to press it out.
- Uneven stitches: Uneven stitches can be caused by uneven tension or incorrect stitch length. Make sure you are pulling the thread evenly through the fabric, and try adjusting the tension on your hoop or frame. To check your stitch length, try counting the number of threads between each stitch - they should be evenly spaced.
- Skipped stitches: Skipped stitches occur when the needle doesn't pierce the fabric all the way through. This can be caused by dull needles or using the wrong needle for the fabric. Make sure you are using a sharp needle, and switch to a larger needle if you're working with thick fabric.
- Fading or bleeding: Fading or bleeding of embroidery thread can be caused by exposure to sunlight or washing. To avoid fading, store your embroidery projects away from direct sunlight, and use embroidery thread that is colorfast. When washing, use cold water and a mild detergent, and avoid rubbing or twisting the fabric.
By identifying the cause of common embroidery problems and adjusting your technique or materials, you can troubleshoot and overcome these challenges to create beautiful embroidery projects.